How (Not) To: Two Cheap Facelifts For Used Wood Dressers

My mother used to refinish furniture, back when I was a kid. She’d work down in our unventilated basement, removing gummy layers of doubtless lead-based paint from the carven grooves of Victorian chairs and love seats. Her tools were putty knives, steel wool, rubber gloves and some seriously harsh solvents. It all seemed pretty intense.
The refinishing itself, I think, was done by a professional. As I remember it, when my mother had done her utmost and the wood was bare once again, the furniture would go off to Mr. Krema’s shop, only to mysteriously reappear sometime later--glowing, polished to a lustrous fare-thee-well. I have no idea what sort of finish Mr. Krema used, but he certainly did good work. If it was a true tung oil finish, though, it would have involved five to seven thin coats, each having been carefully sanded before the next one could be applied.

Now, it is much easier. And that is good news, because for those on a budget, there is much old furniture available which can be bought inexpensively and restored to more-than-acceptable appearance with comparatively little work. Here’s a case study.
When a large oak tree struck our master bedroom, it created worse problems than a crushed dresser—but eventually (and thankfully!) the time came to sort out our bedroom furniture. We already had one dresser, about which we felt some discontent—the drawer pulls made it look a bit stodgy. It would serve—but we still needed a complement to it, to have adequate drawer space. Since this was to be only a medium-term solution, we didn’t want to spend much money.
The solution? Buy a used dresser, and match it to the existing dresser by giving the two similar finishes and hardware.
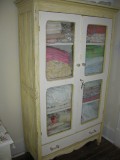
Part One of the plan went smoothly. We found a solid pine dresser on Craigslist for just $60 (plus a couple of gallons of gas to fetch it.) It was a bit distressed; the finish was worn and marked with crayon scrawls here and there. Looking at it, I realized that it was actually homemade!—the oaken drawer pulls, though commendably similar to one another, were not a good complement to the pine drawers. And their shaping was clearly not a product of professional design; I’d have to call them ‘clunky’ at best. Overall, the piece was not very attractive.
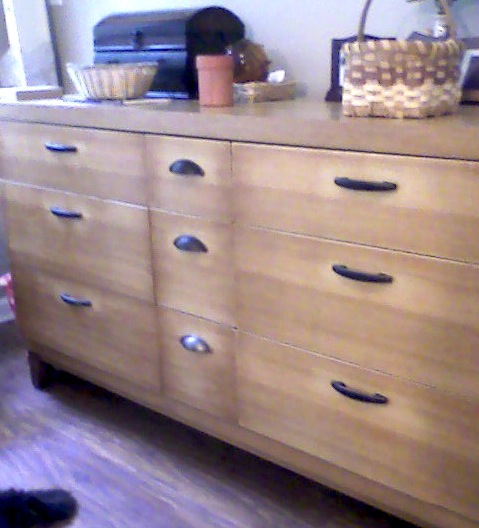
Here is a picture of it as it is now:
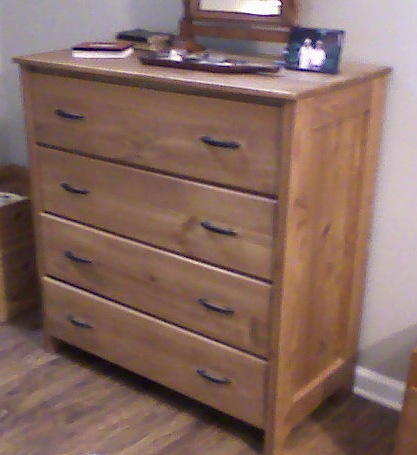
Not bad! What did I do to get it to this state?
Not all that much. First, it was refinished. That’s the harder part, but need not be nearly as arduous as it was for my mother and Mr. Krema, back in the day.
Then the unattractive drawer pulls were replaced with new ones—attractive ones (to our taste at least.)
The Refinishing Process Outlined
The piece had to be sanded completely—twice, once with a medium-fine-grit sandpaper, and once with a very fine steel wool. That removed the old finish and the crayon marks, as well as some scratches and dings in the wood, leaving a smooth surface. (Of course, all hardware is removed first.)
Then the piece was stained with Minwax one step wood finish—the “Golden Pecan” shade, to be precise. It’s not as tough and durable as old Mr. Krema’s finishes. But it also doesn’t require much skill, time or effort. In fact, it’s ideal for a busy mom or dad: all you do is shake the can and wipe on the stain with a rag (a brush can be used, too, but a rag is much simpler as it holds and distributes the stain better—unlike paint, “poly” tends to run right off the brush.) Then you wait five to fifteen minutes and wipe off any excess stain, and let the stain cure for a few hours. (You can touch it while it cures, if you must; unlike paint or varnish, it won’t come off on your clothes or skin.)
The complete process for this dresser took less than a day, including planning, shopping, sanding, and staining. (As I recall, I left installing the new drawer pulls until the next morning.) Unfortunately, I was in such a hurry that I didn’t take pictures of the process. But fear not—I still had the other dresser to do!
Details And Considerations
The second dresser was the harder of the two. First, it was finished with a hardwood veneer, as opposed to the solid pine of the first dresser. Pine is much softer, and thus easier to sand down. Second, the original hardware had been tightened down hard, scarring the surface. But the new hardware would leave these areas exposed, so I would have to remove a lot of wood to eliminate the scars. And third, there would be challenges with the new hardware. Plus, this dresser was just plain bigger!
Sanding
The sanding is pretty straightforward, if tedious. Just be patient, be thorough, and sand in straight strokes parallel to the grain. (I am, in the picture below--even if it looks as though the angle is a bit off!)


One tip—be consistent in your choice of sandpaper. I did not do this. Partway through I succumbed to the temptation to save time by going to a coarser, more aggressive sandpaper for my ‘first sanding.’ It 'worked' in terms of saving time—but I wasn’t quite able to match the look I got with the look of the parts done with finer paper. (Though “able” may not be the correct word--since it is always possible to remove more wood, in theory I can still correct the finish to match better. In practice, a time came when I didn’t think the improvement justified the effort. Others, of course, may differ.)

Once the entire piece has been sanded and smoothed to your satisfaction, you are ready for the fun part, the staining itself.

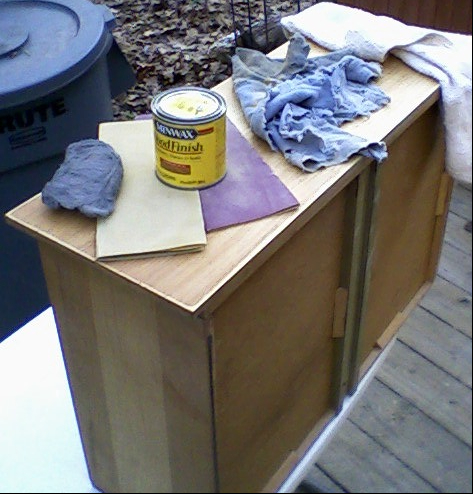
Staining
As described above, there is little more to do than shake the can thoroughly to mix the finish. Then wipe on the stain with a rag (one not too absorbent is good—polyester is better for this than cotton, which really soaks up the finish, leading to a bit more waste.)
A few surfaces may be unevenly absorptive, or relatively impermeable—an example of that is the shiny pressboard sometimes used for drawer bottoms, or the backs of shelves. There is a treatment available to help such problematic surfaces better absorb stain; you can use such a “preconditioner” if you need to, but in the great majority of cases this is not needed.
Once the stain has been absorbed into the wood’s surface, wipe off excess with a clean rag—cotton is better than polyester here, as it picks up the excess better—and allow the finish to cure. It’s a matter of a few hours, but as mentioned above, no particular protection for the finish is needed in the interim. Simply avoid anything touching it for a prolonged period during curing—so nothing on top, or leaning against it. But casual touches are unlikely to do any harm.
Just a word on color: you can’t give different woods the same appearance simply by applying the same stain to each; the color and grain pattern still show through. The “Golden Pecan” stain I used on both dressers does provide an element of similarity to both that makes them seem as though they do belong in the same room together, to my eye at least. But they are still perceptibly different; the pine, for instance, has a distinctly red-gold tone.
Changing The Hardware
The hardware was the bigger challenge, and the greater expense. Drawer pulls vary quite widely in cost, design, appearance and size. As you can see, I needed a total of 17—8 for the pine, and 9 for the veneer, of which two different patterns were required. Ours were relatively modest; simple in design (though with an antique bronze finish), they cost about $3 per pull, for a total of roughly $50.
The pine dresser was easy; the craftsmen who built it had used a 3-inch spacing when he carved his oak pulls, and that matches the most common width in stores today. The large side drawers on the veneer dresser, unfortunately, did not match; the original pulls had a three-and-three-quarter-inch spacing. That’s pretty rare today, which meant few choices were available. But the wider-spaced holes, I determined, would be covered up by the ‘footprint’ of the new pulls. All was well, then—provided I was careful enough drilling the new holes.


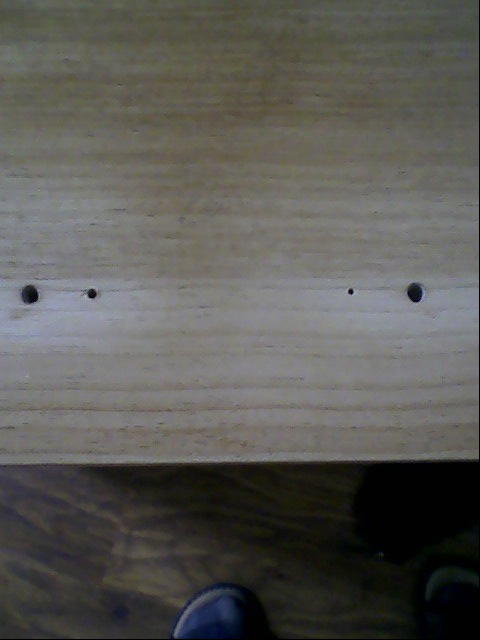
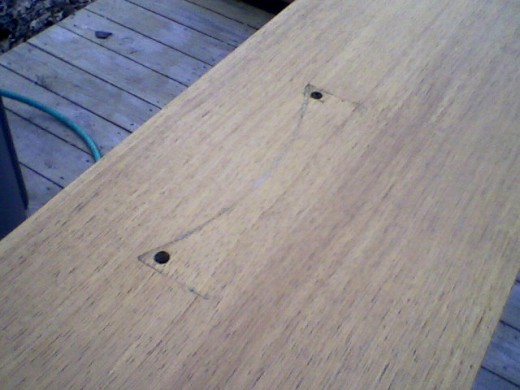
The main difficulty was the small center drawers in the larger dresser. If there were few three-and-three-quarter inch pulls, there were absolutely none on one-and-one-quarter spacings similar to the originals; I found nothing even close to that small. And since the old holes would be smaller than the new ones, therefore, they couldn’t be concealed in the same manner as the ones for the side drawers.
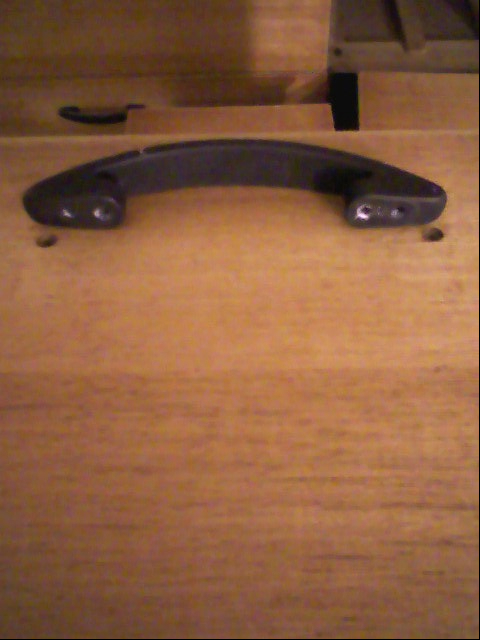
Luckily, there was a solution. By adopting ‘cup’ pulls—the term is probably pretty self-explanatory if you look at the picture below—the holes could be concealed not under the actual footprint of the pull, but at least under the ‘cup’ which one grasps in order to open the drawer. These pulls wouldn’t be a true match to the others, but the finish and the general style could be matched, and that, I decided, would be good enough.
But there was still the difficulty of mounting them correctly. Unlike the side drawer pulls, the holes could not be drilled in line with the old ones; for the pulls to line up correctly, and to hide the old holes, the new holes needed to be drilled lower on the face of the drawers. And of course, I still wanted them to line up reasonably well with the pulls on the side drawers, too!
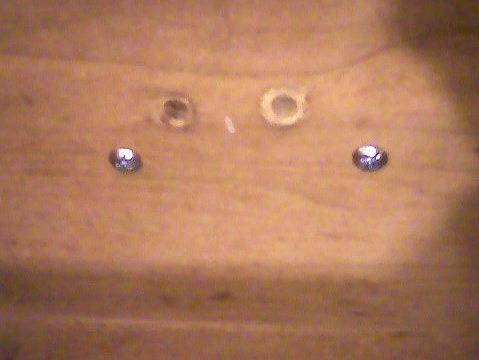
After painstaking measuring, trying, and rethinking, the holes were drilled two-and-five-eights of an inch below the tops of the drawers. To my very great relief, this worked well, and looked fine when the cup pulls were installed.
And that’s it. Two day’s work, more or less, and about $120 gave us a respectably attractive, functional pair of dressers. Not the ultimate, but more than adequate for our current needs.
I’m not sure about old Mr. Krema—but I know mom would have approved.
Some Other (random) Hubs by Doc Snow
- Understand Chords: Chords In Keys (Part Two of a Series)
Chords are important musical building blocks, of course, but they aren't just isolated 'things.' Rather they belong more or less naturally in certain 'keys.' Learn about them here! - Fire From Heaven: Climate Science And The Element Of Life--Part One, Fire By Day
We depend upon the 'fire' of solar radiation for our very lives. But how intense is this fire? Does it change? Here's the story of these questions and their answers--and of the people investigating them. - Strange Days Again: Remembrance And The Doors' Sophomore Album
Music and memory intertwine: The Doors' most innovative album, "Strange Days," analyzed and remembered. What it was, is, and why it mattered so much to me. - How (Not) To Practice Music Efficiently, Part Two
Practice more efficiently and get better faster with these practical strategies! Topics include practicing for continuity versus practicing for problem-solving; changing the terms of the practice problem; and practicing with a metronome. - Nocturnal Paraphrases
Nocturnal Paraphrases is a short poem, presented in six photo capsules. Each is like a page unto itself, text over image. The poem is about "life, death, places I’ve been, things I’ve done, and the process of change. Canoeing. And how it felt." - Inuk Was A-Positive: A Brief Meditation
The far-off and long-ago grabs our imaginations, and can inspire romantic fancies. But sometimes it's the mundane detail that hits the hardest.